IC706Mk2
IC718

IC 756
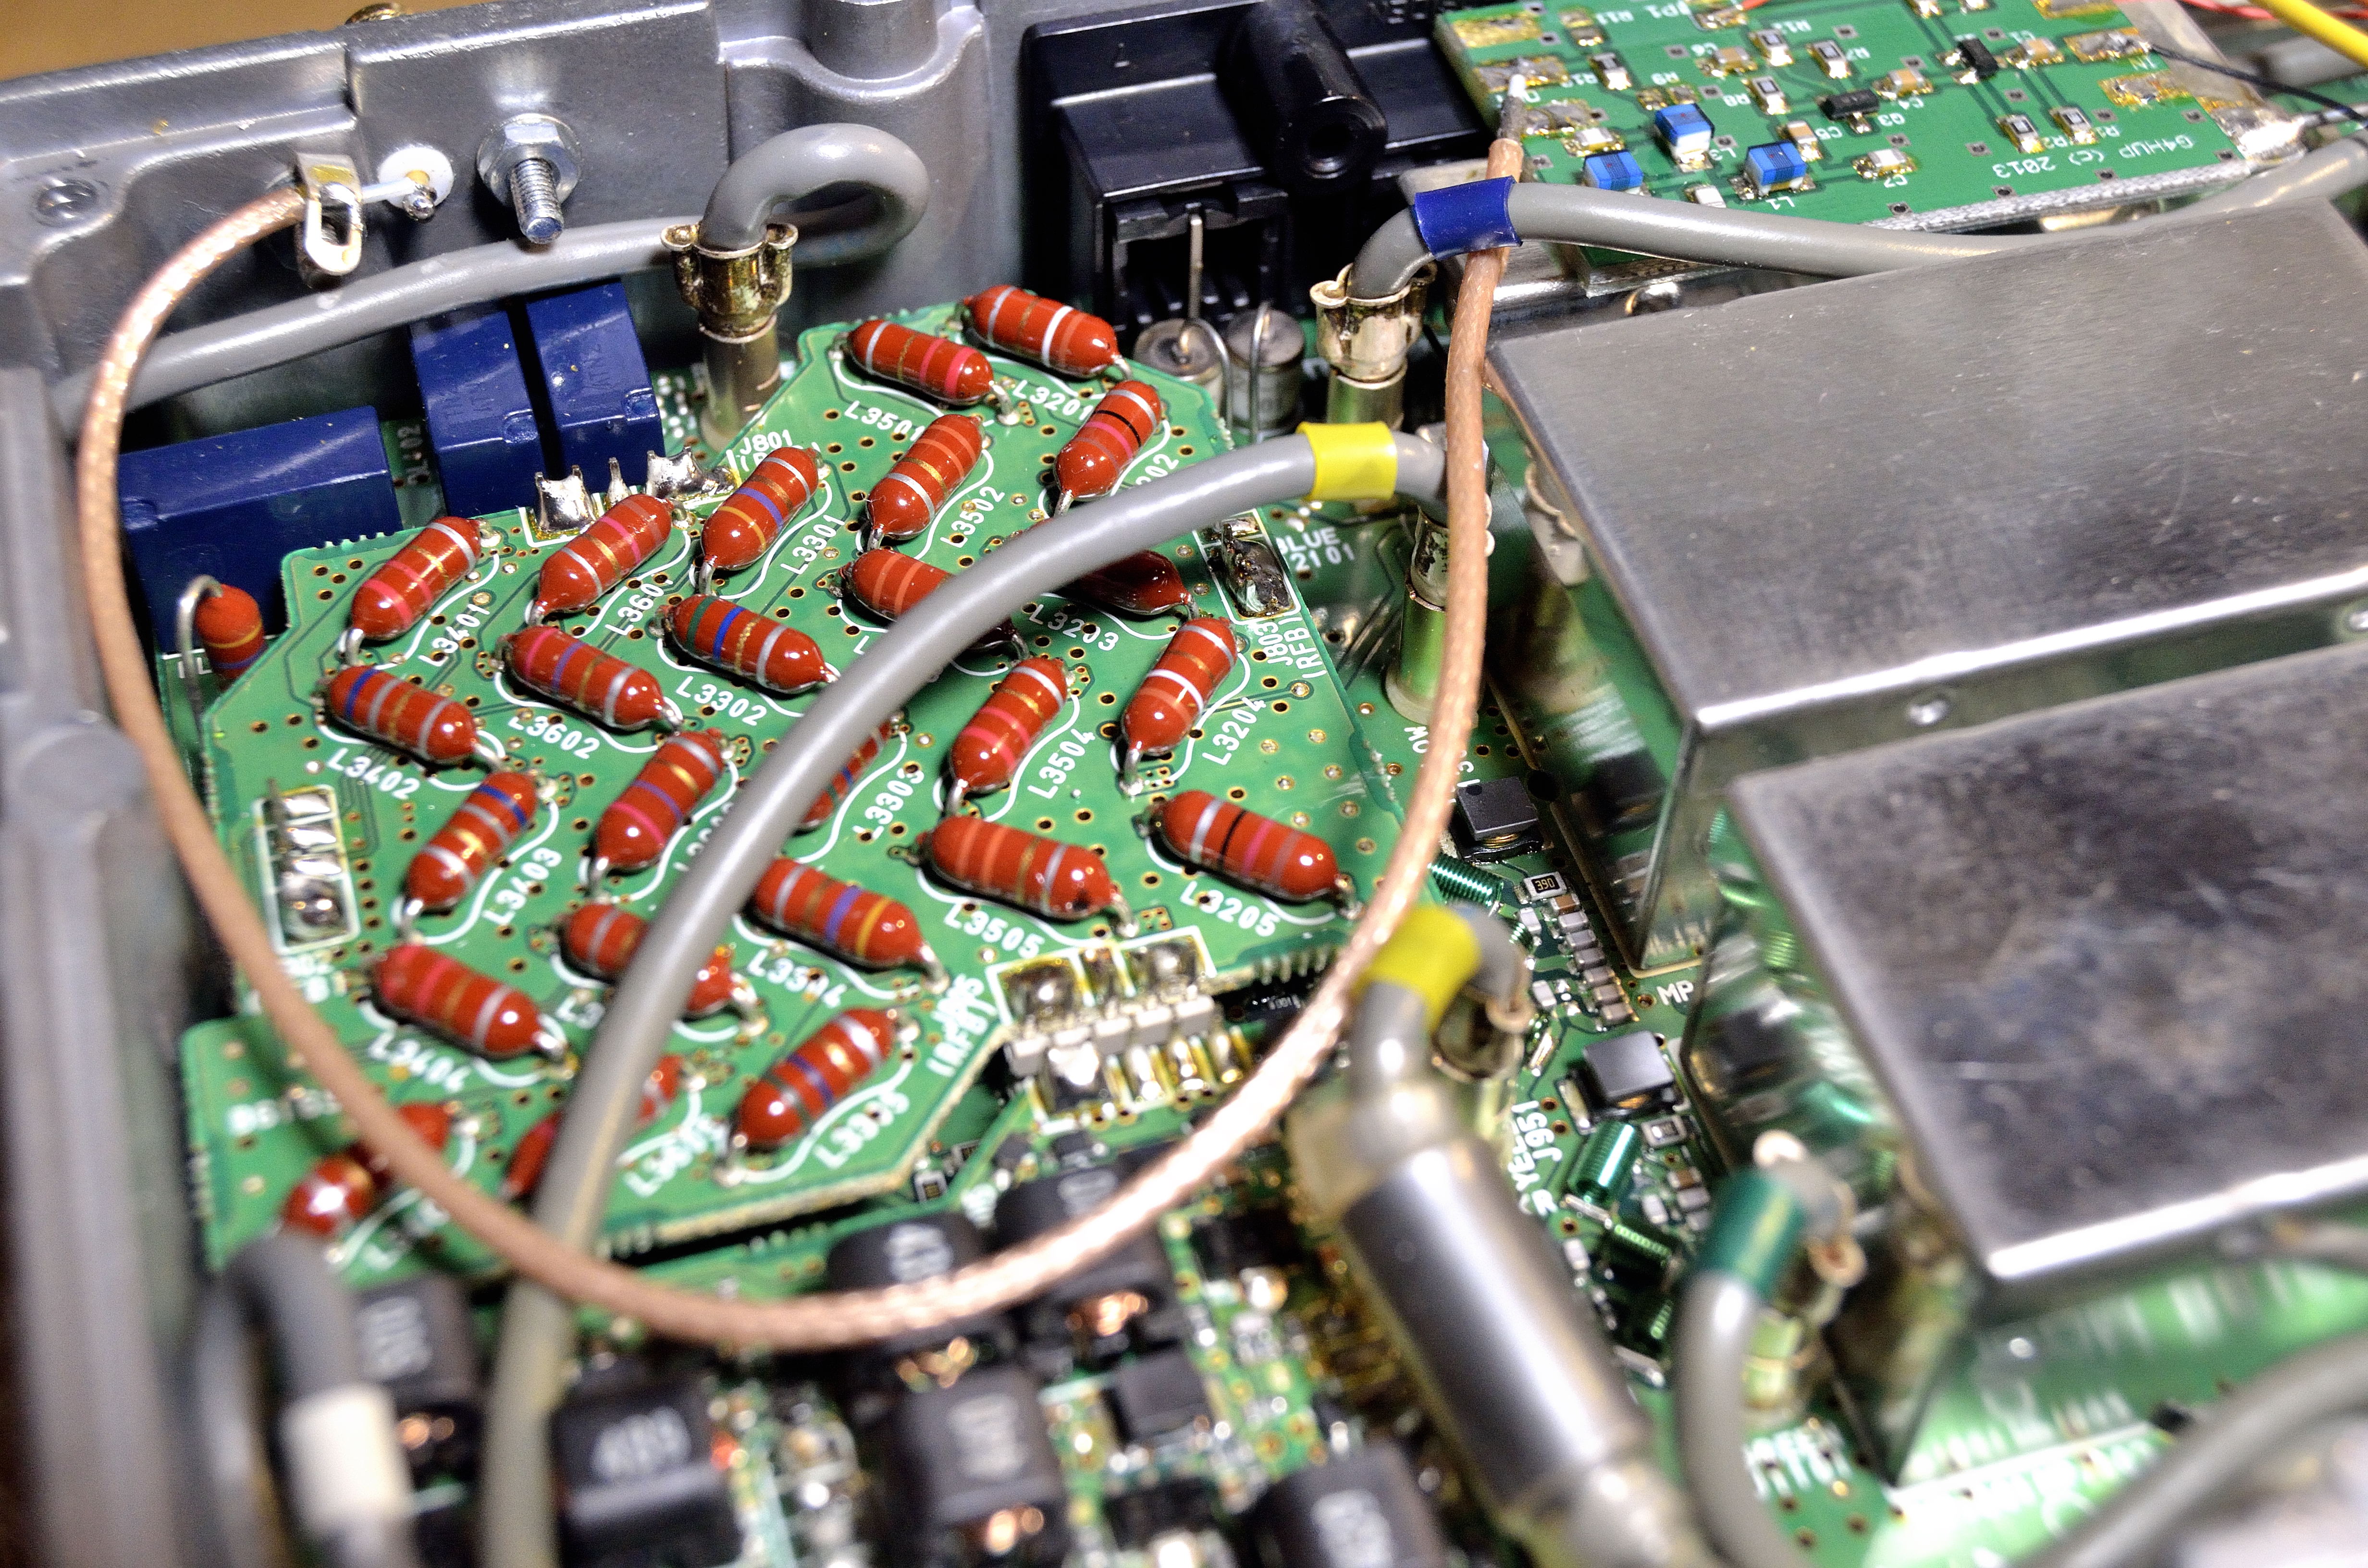
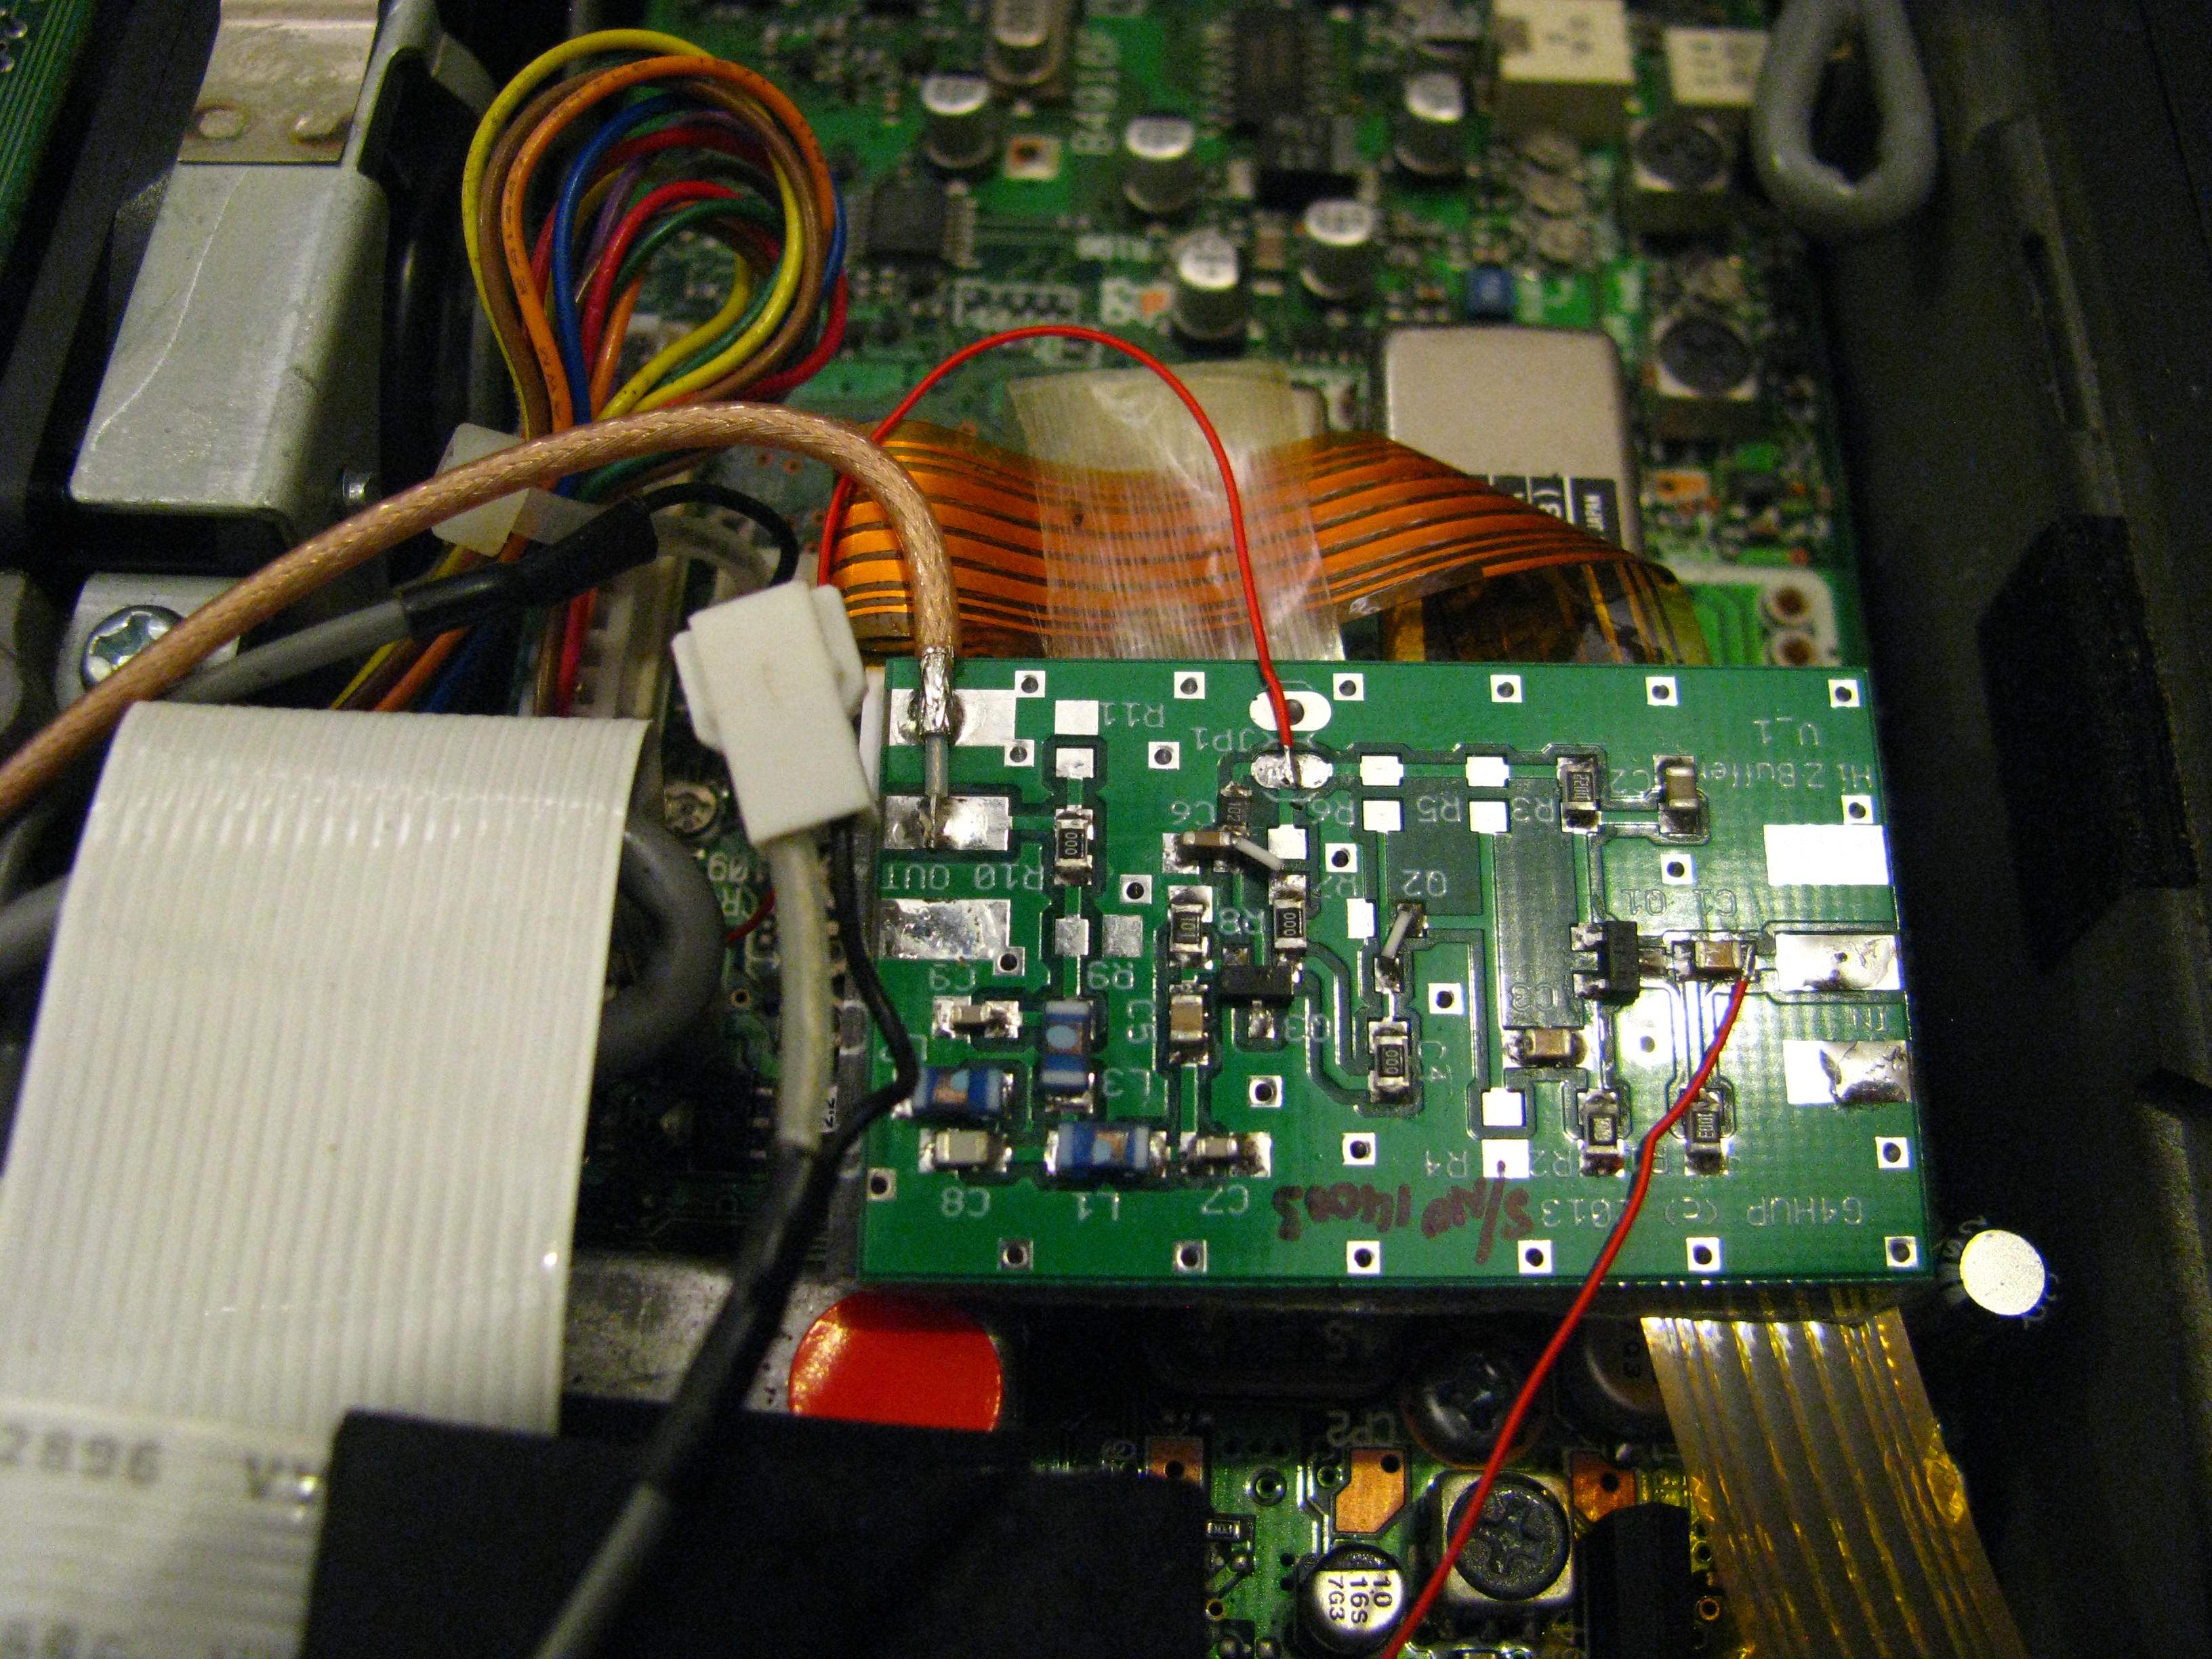
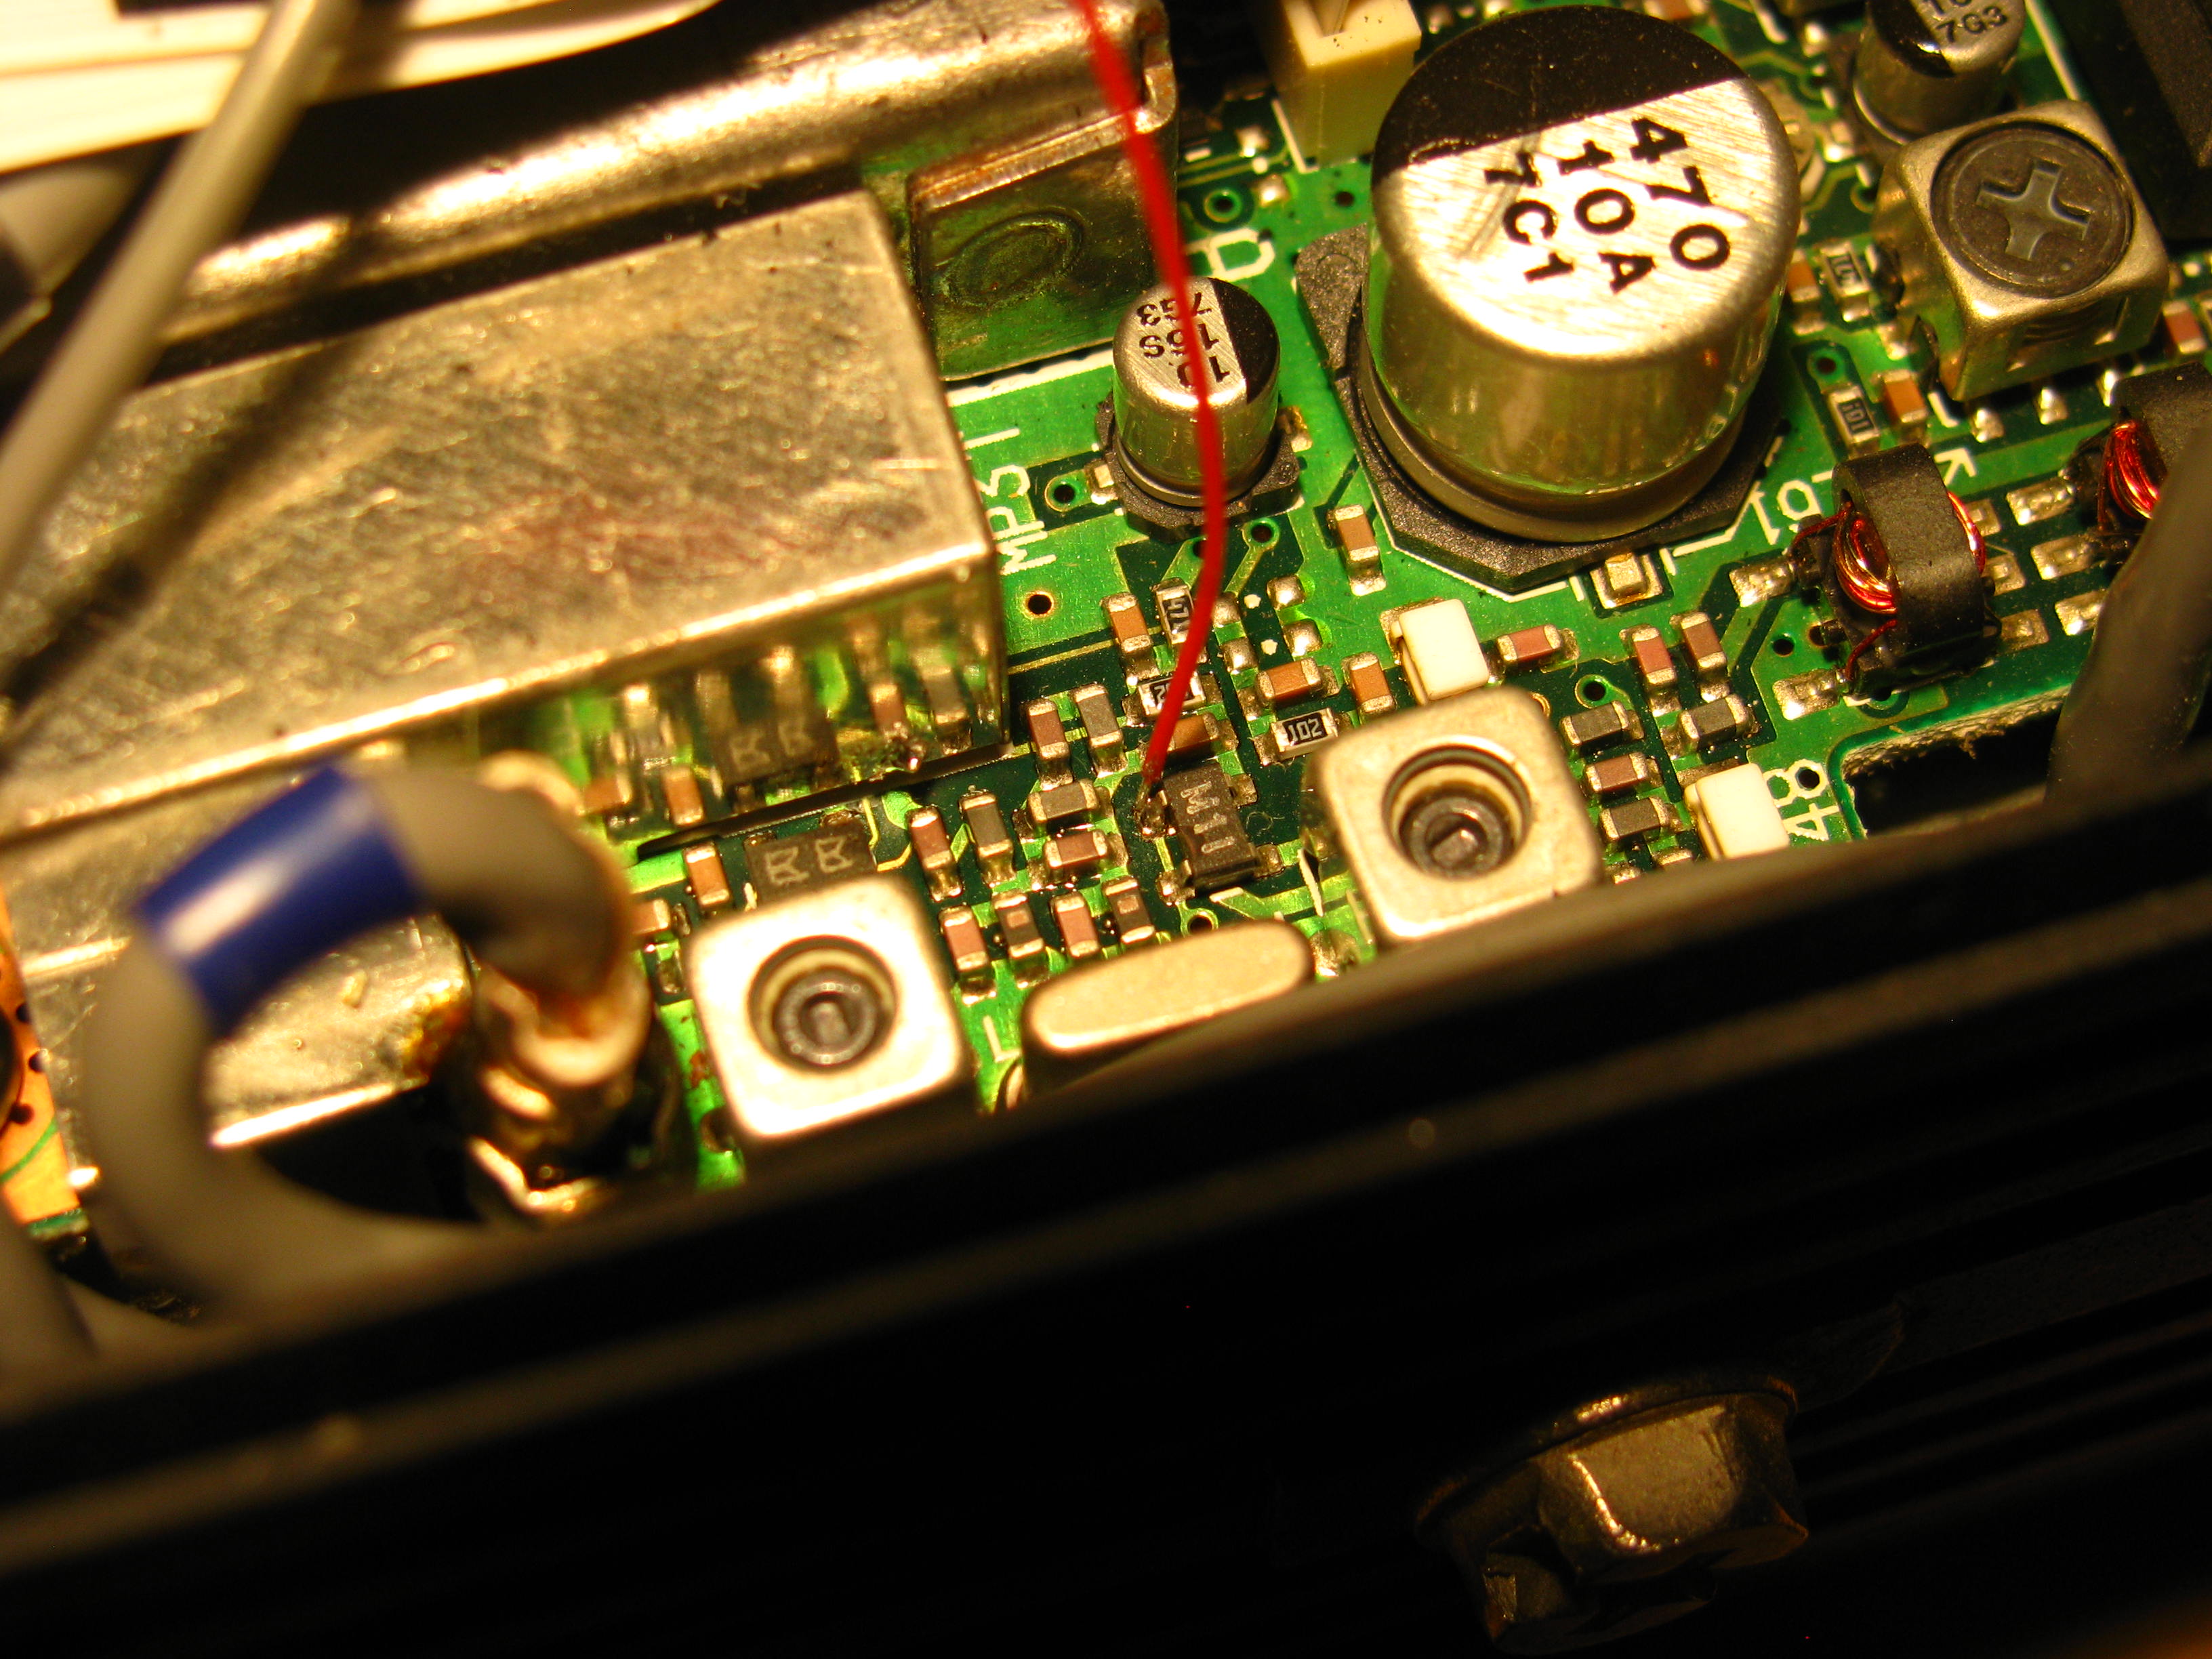
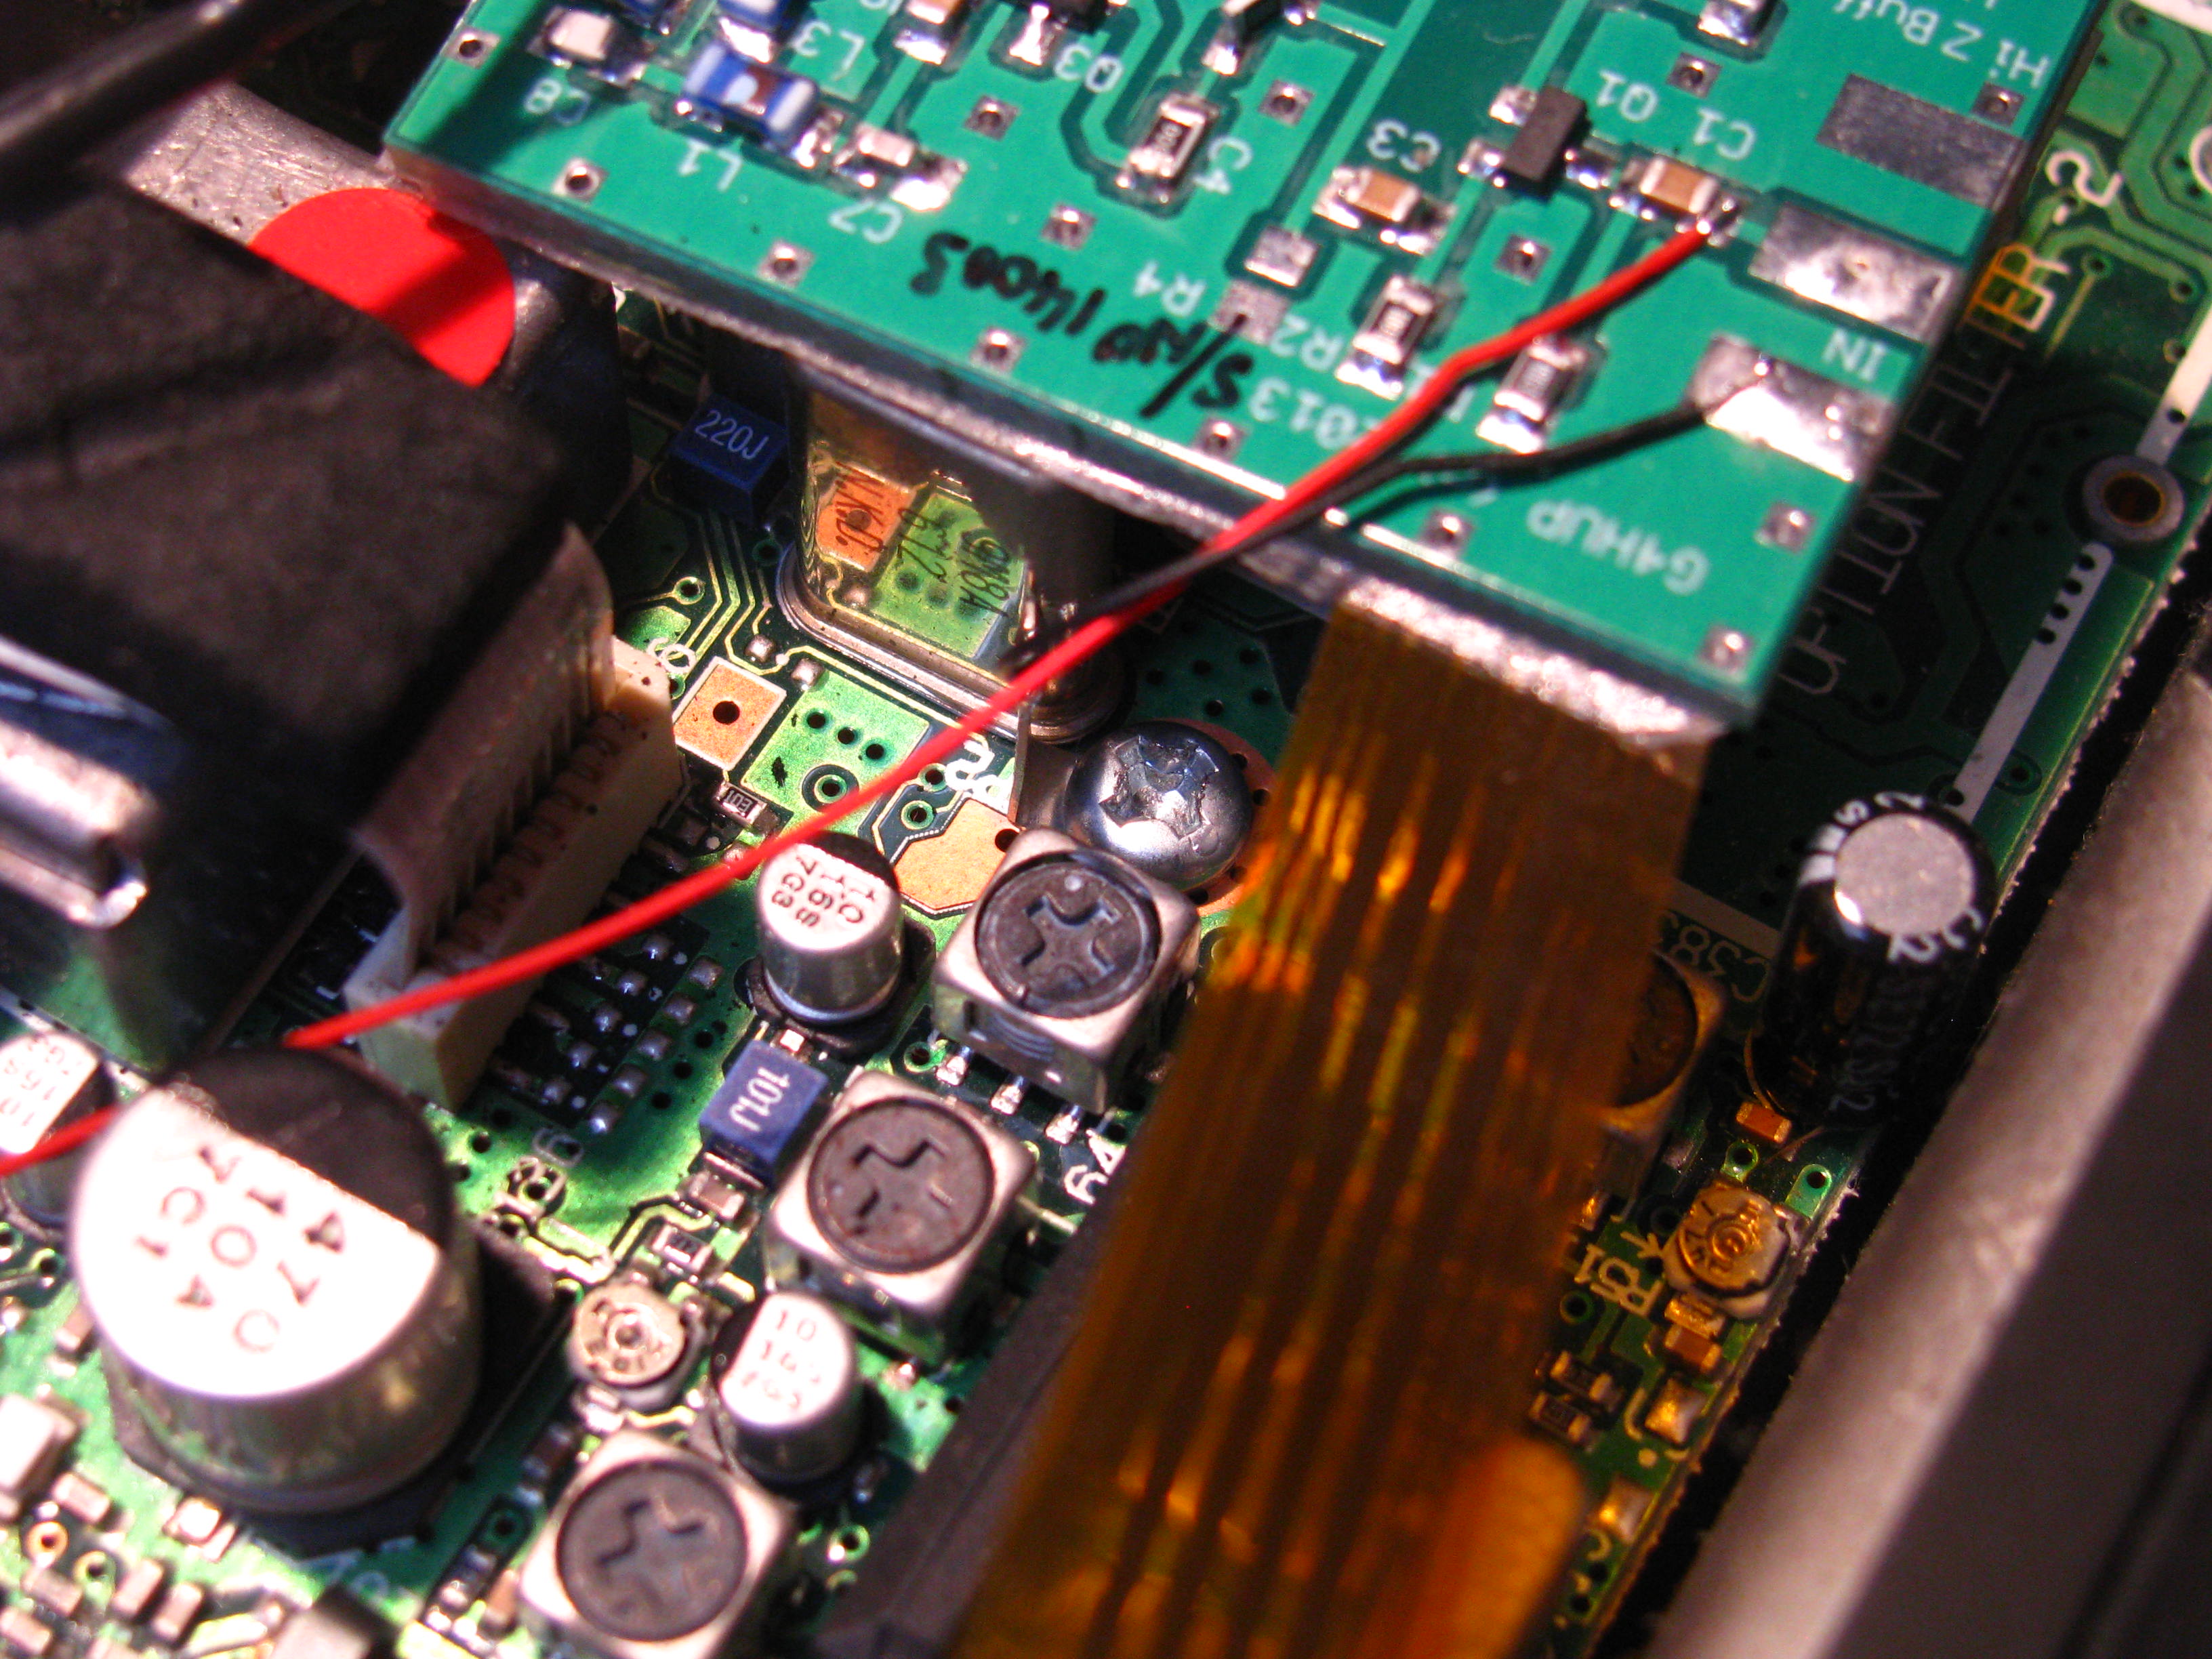
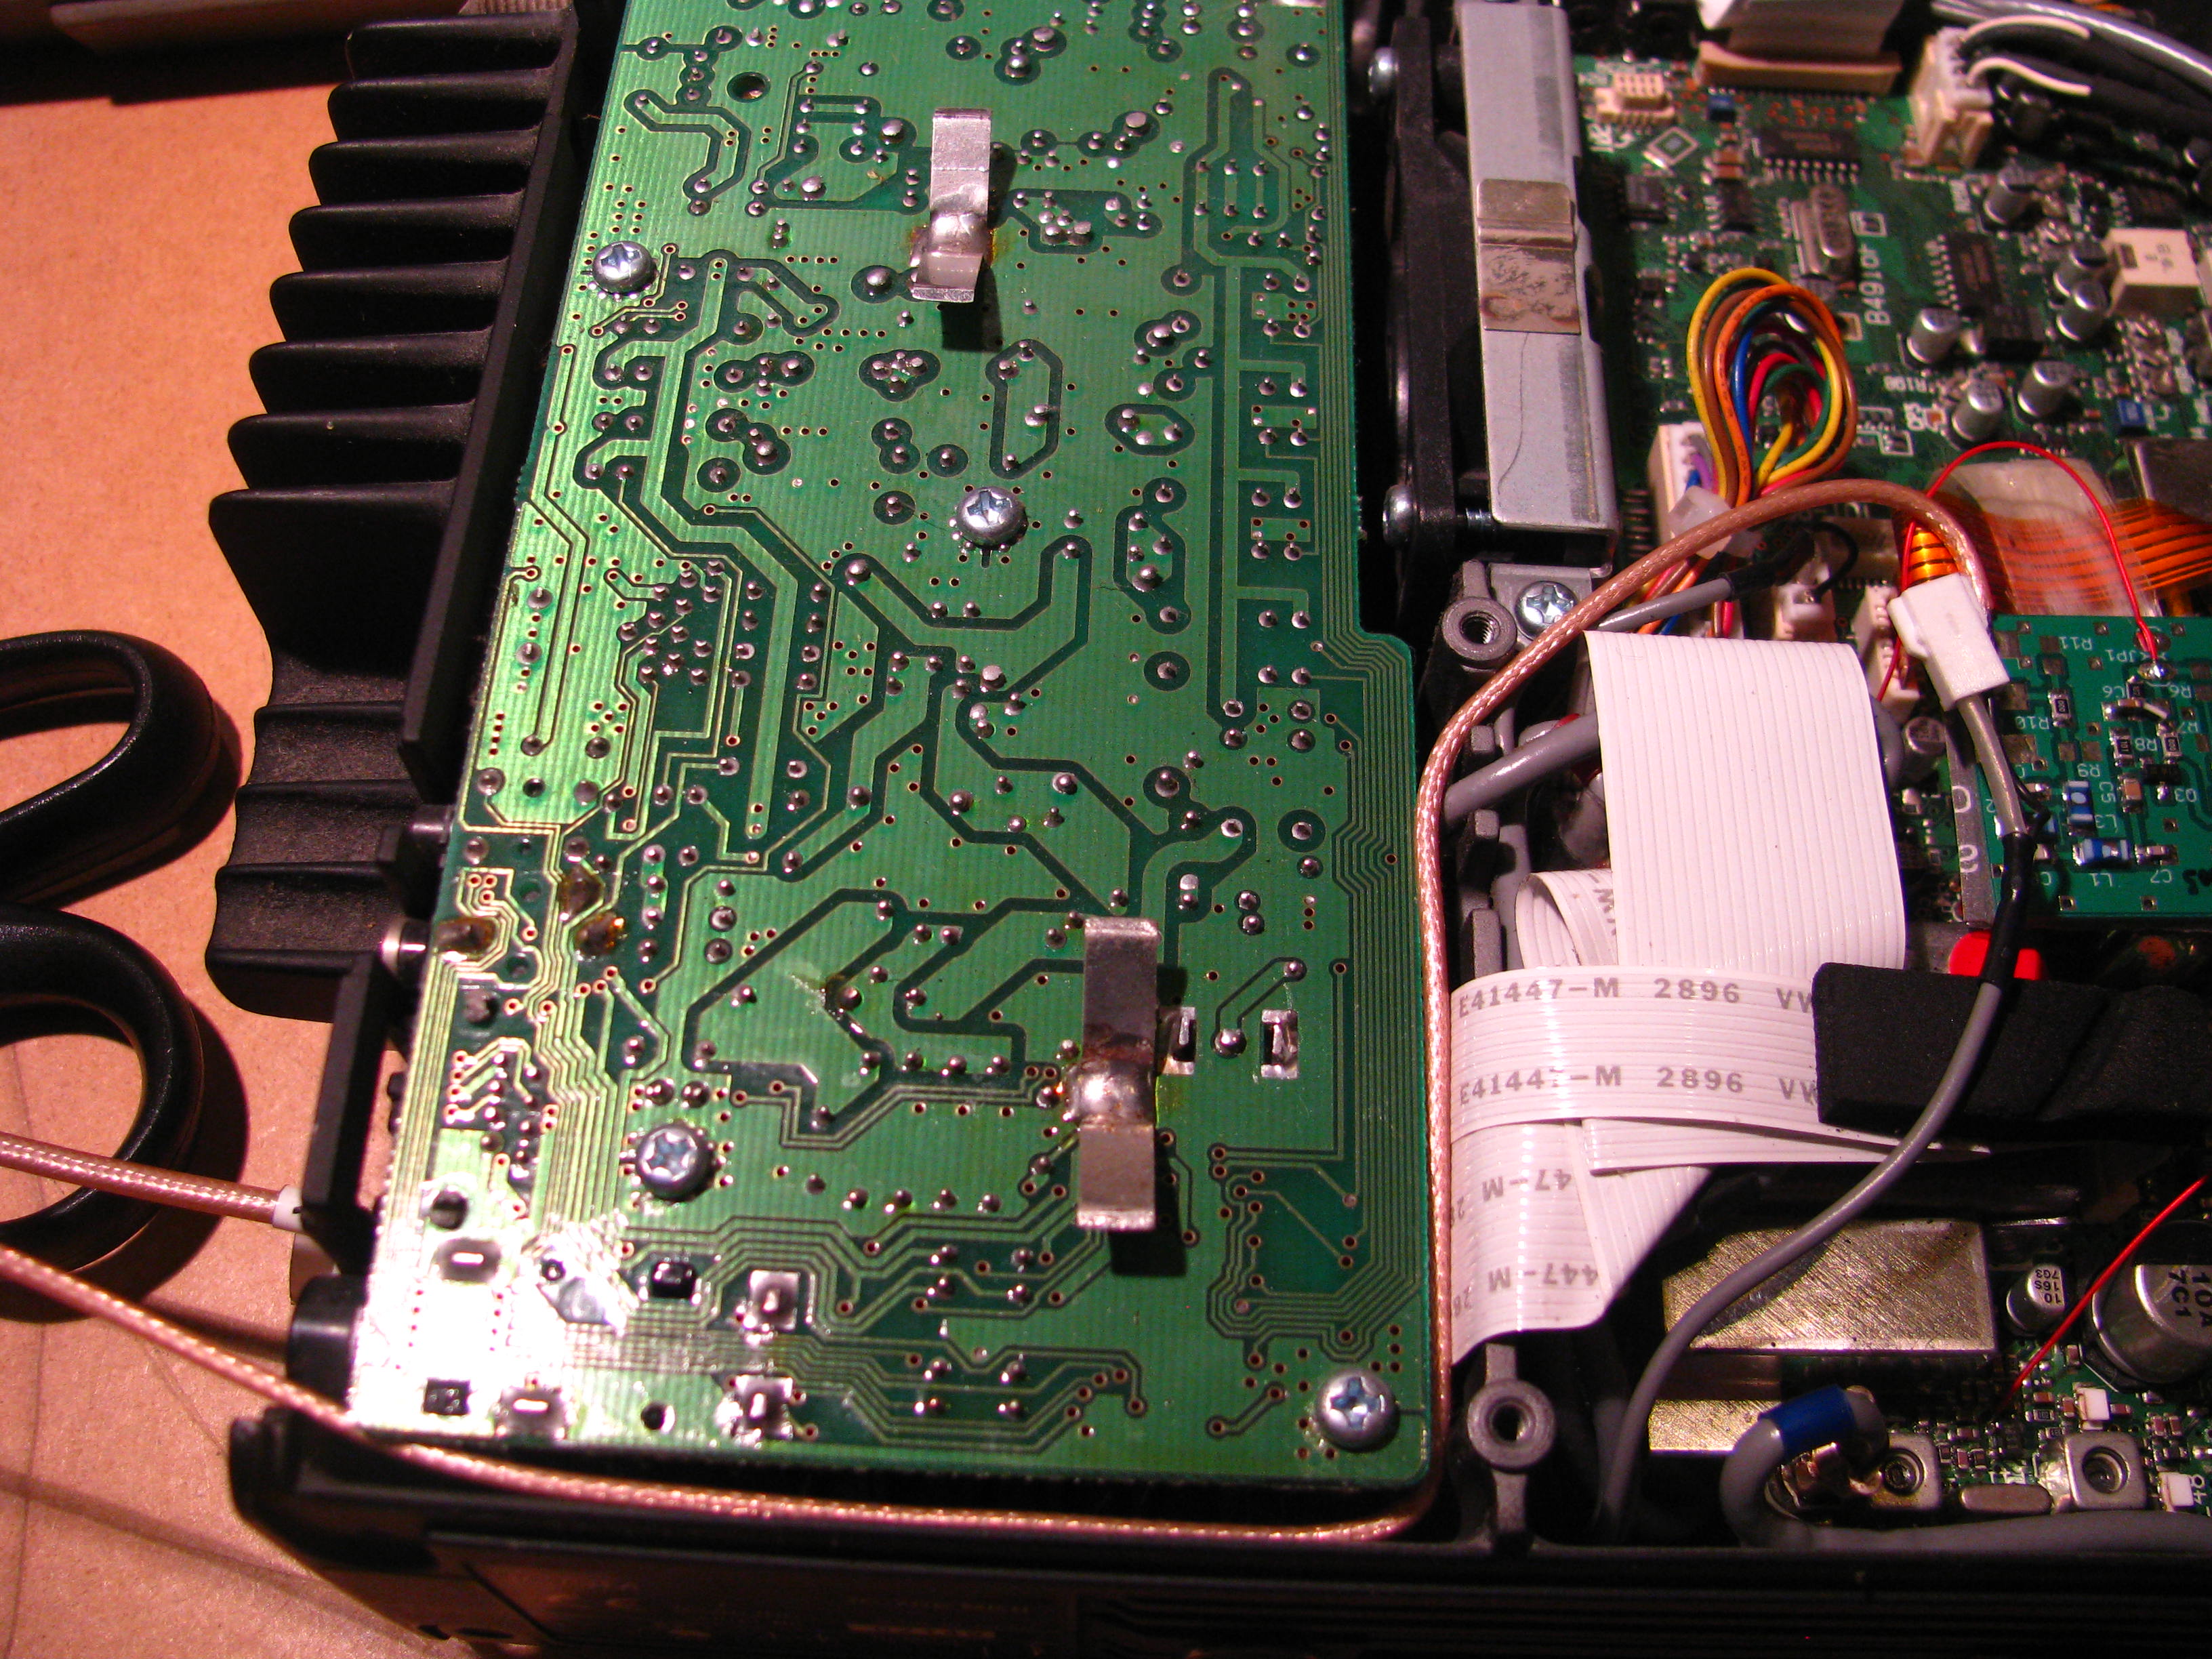
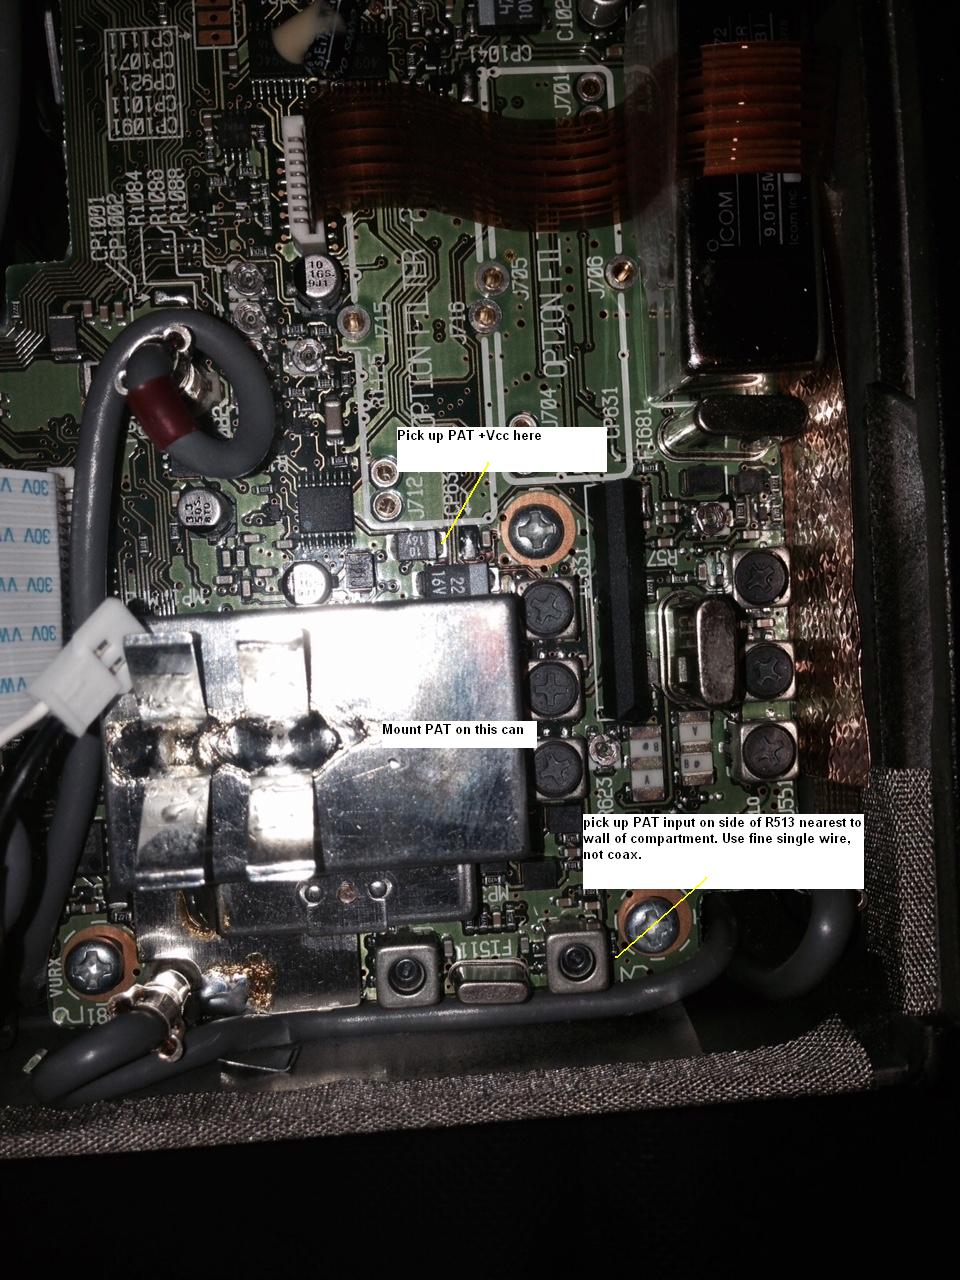
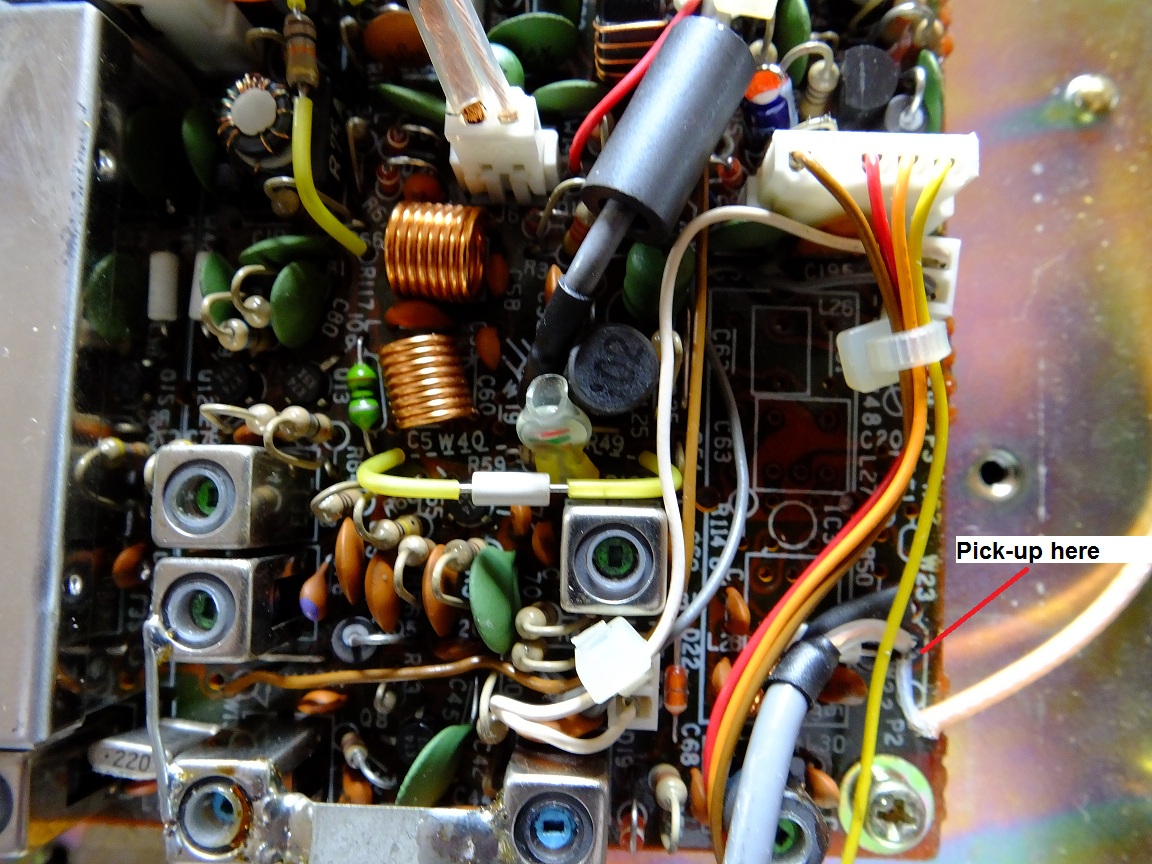
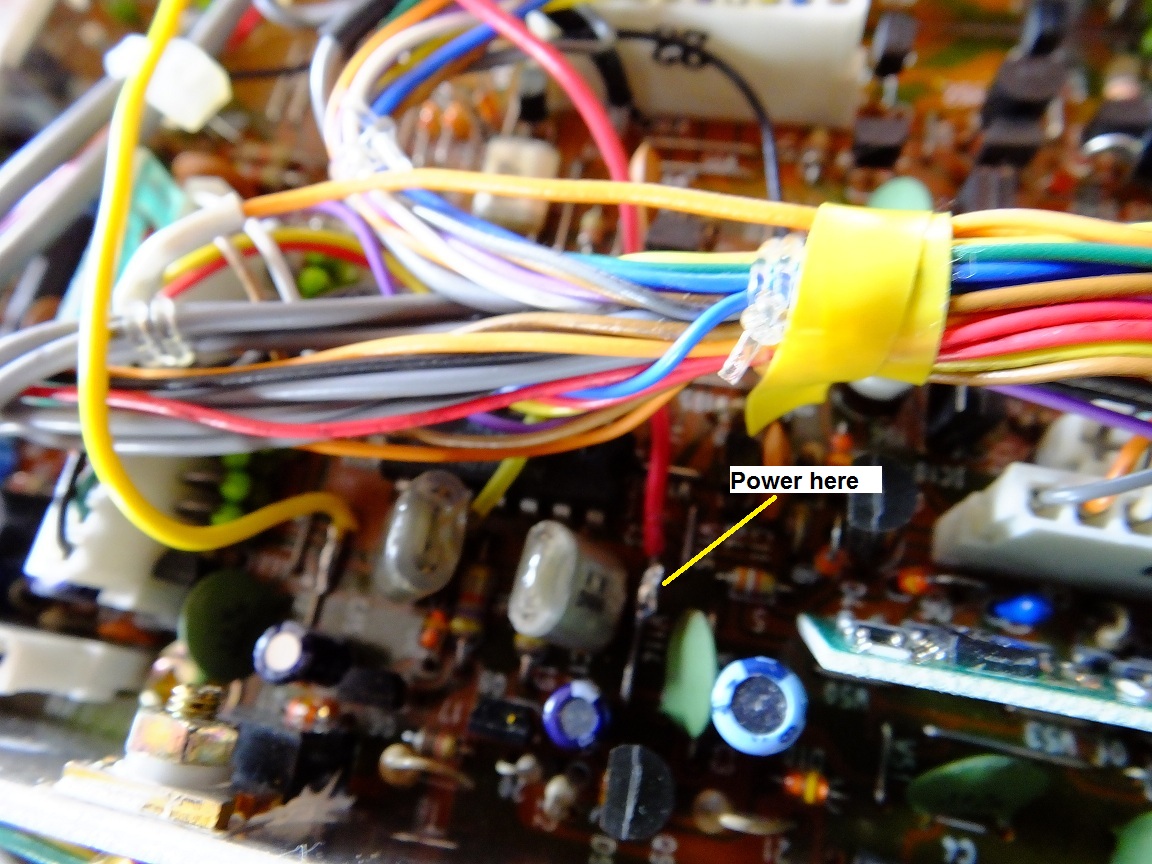
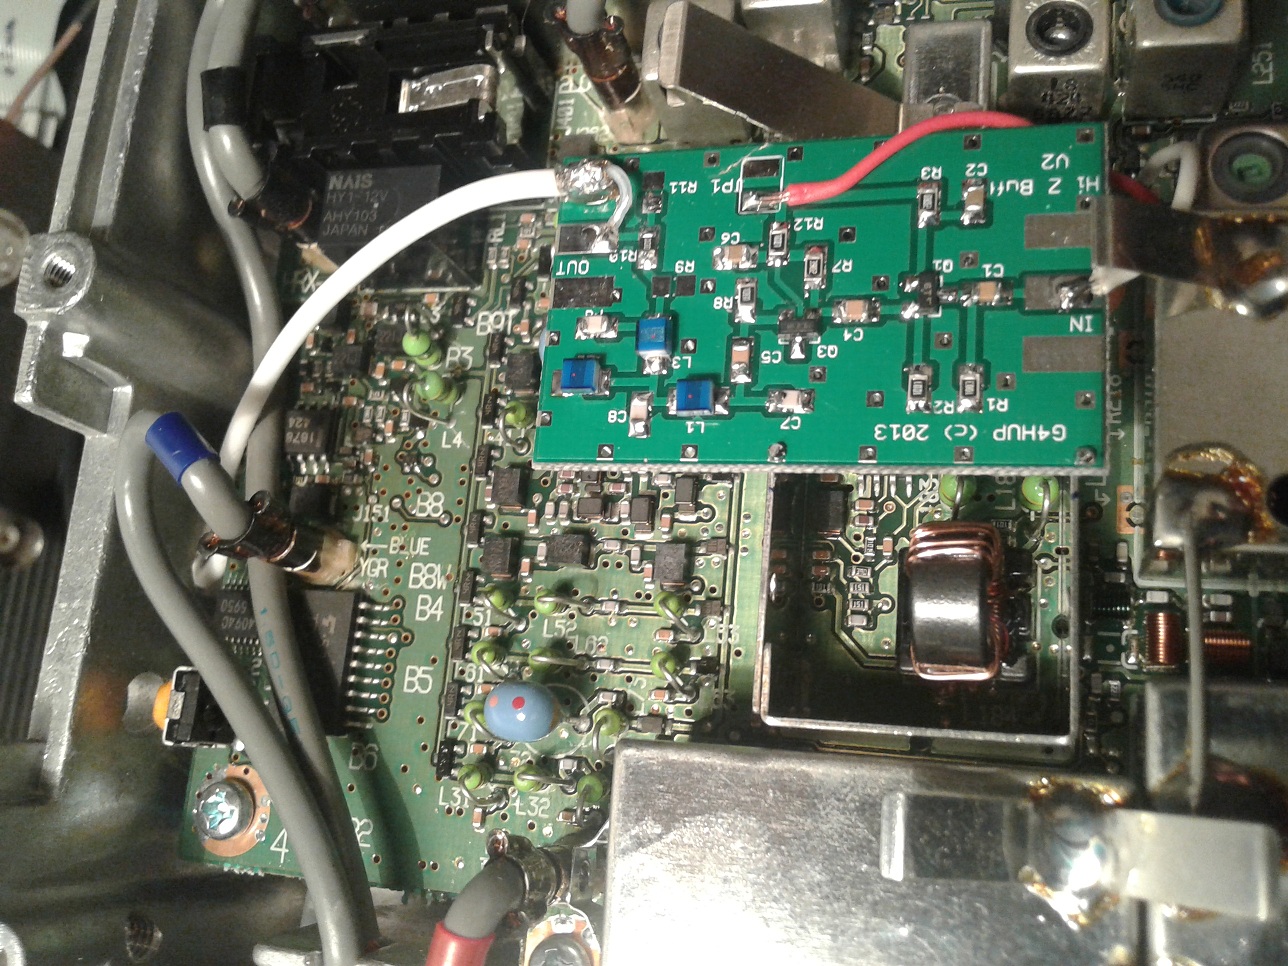
IC7100
PAT installed in IC7100 – note that the blue capacitor is not required, but remains from a previous direct tap.
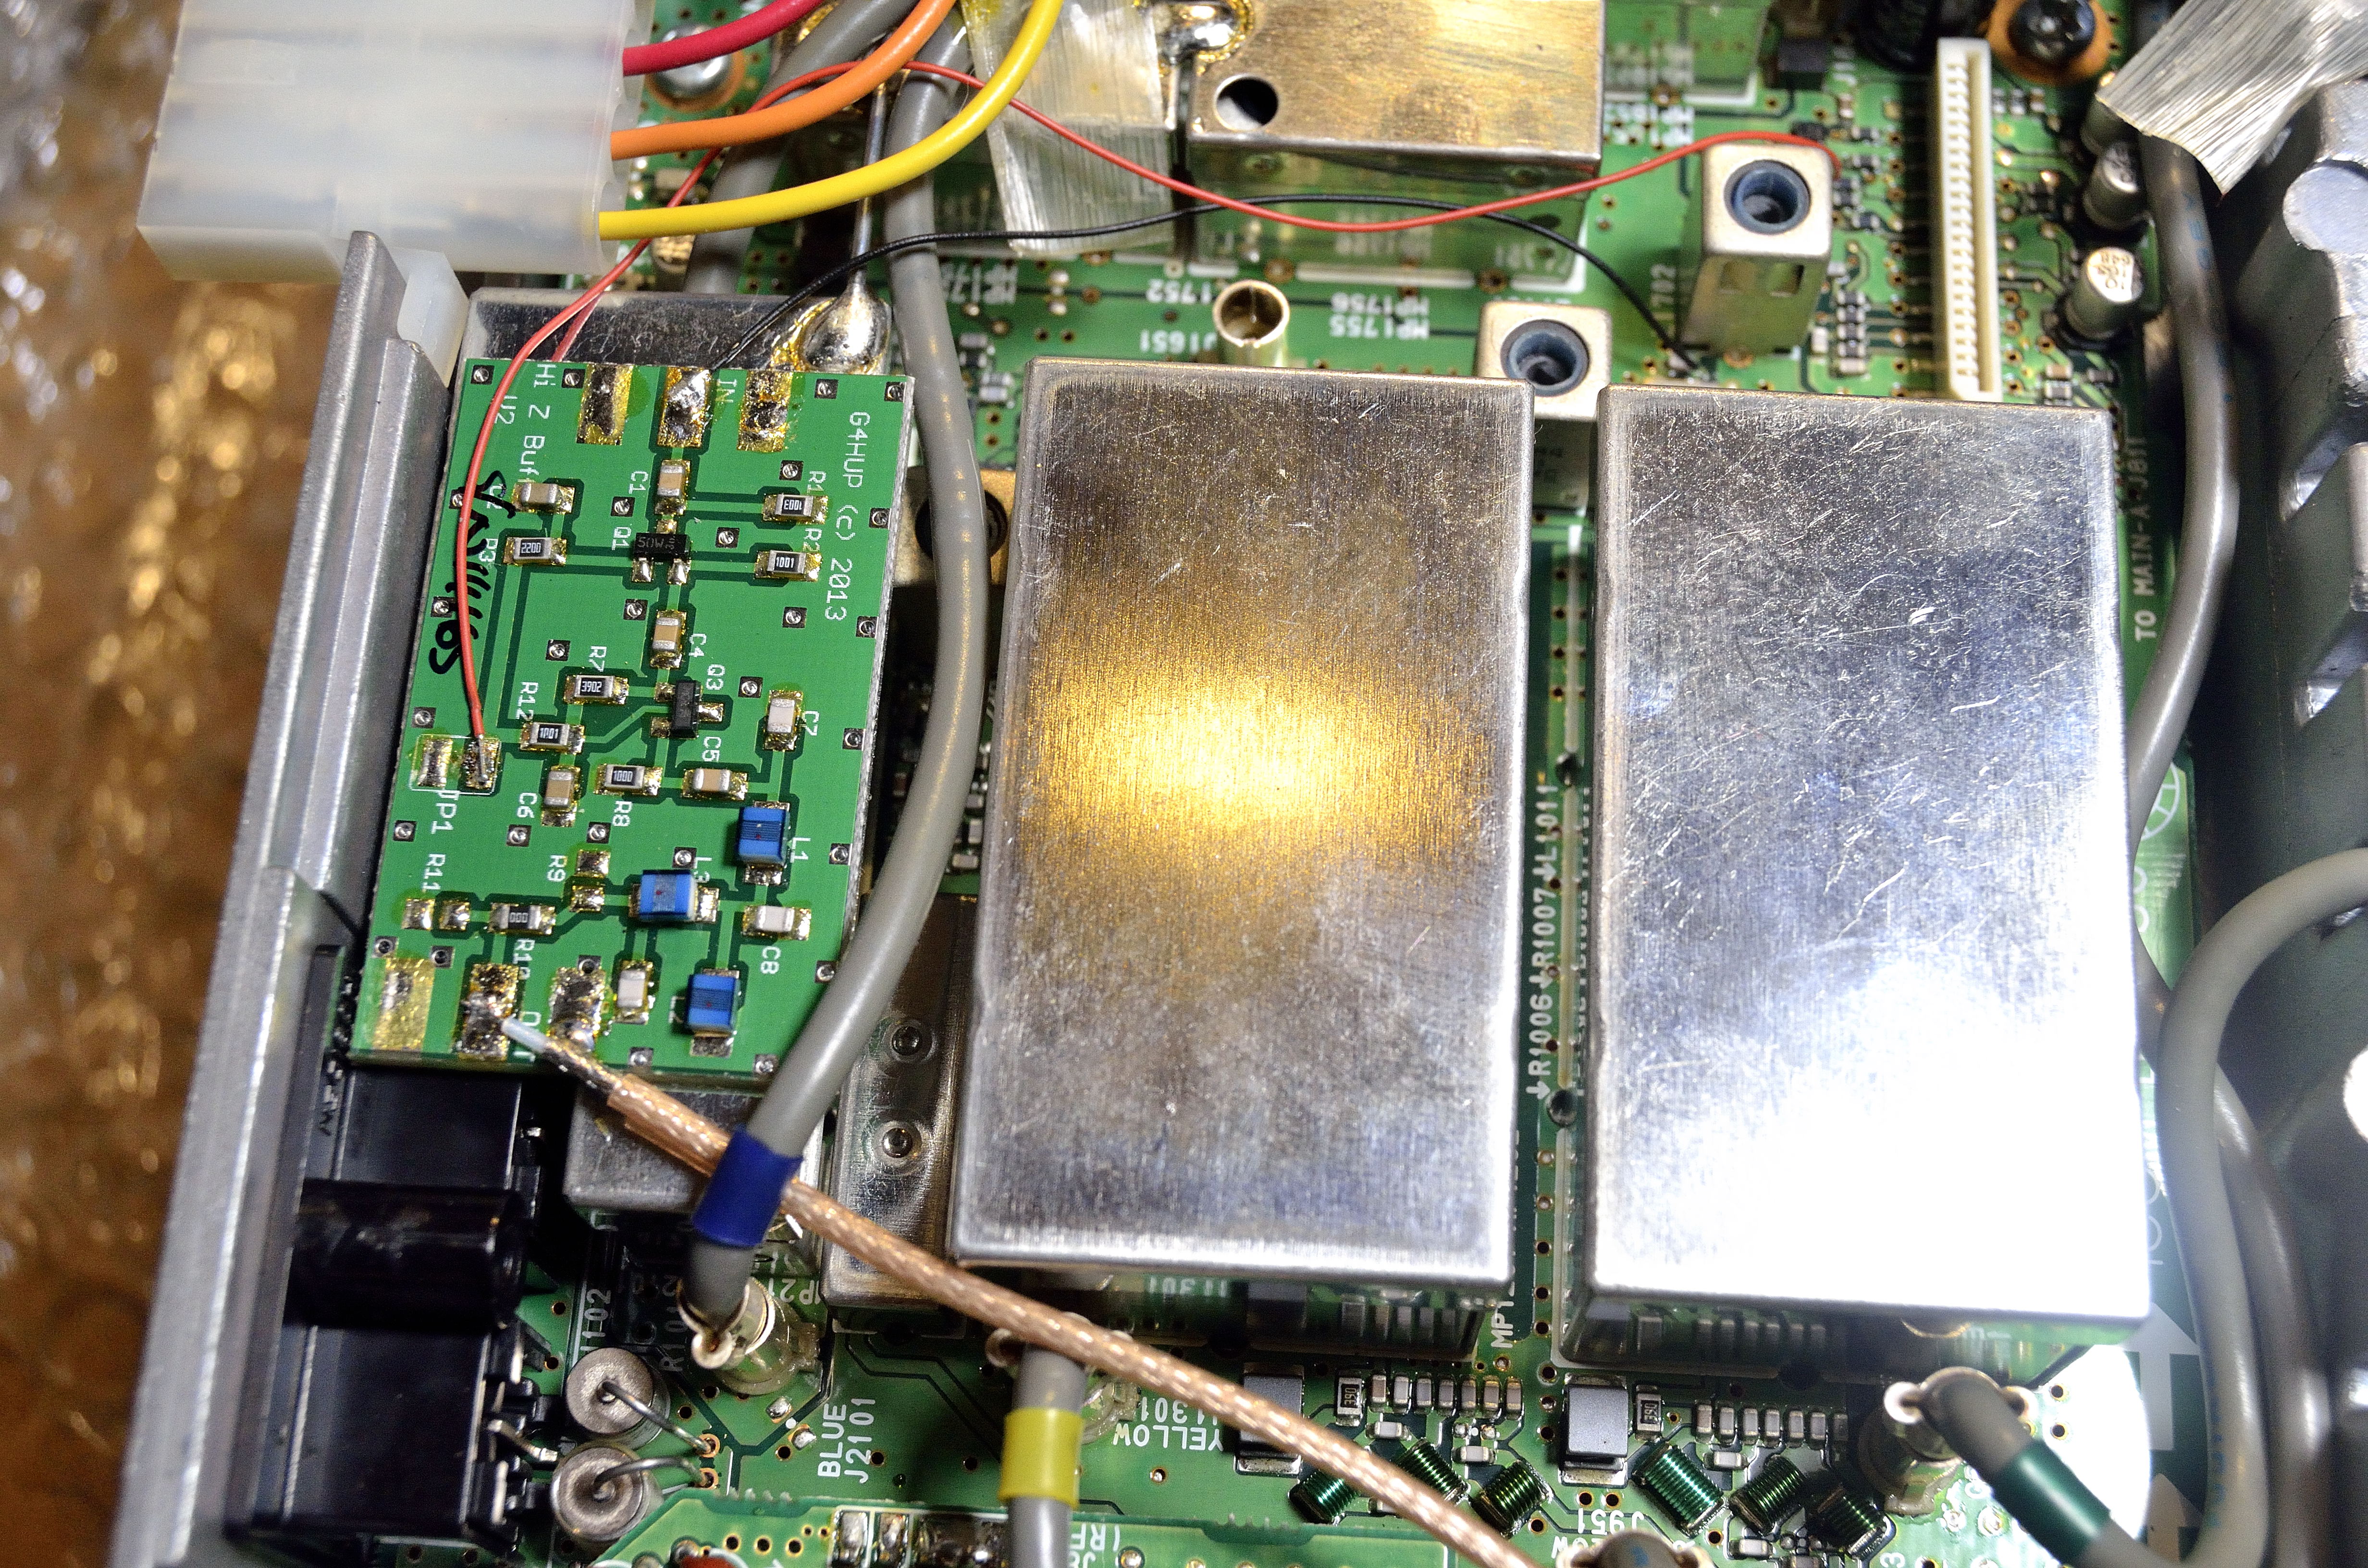
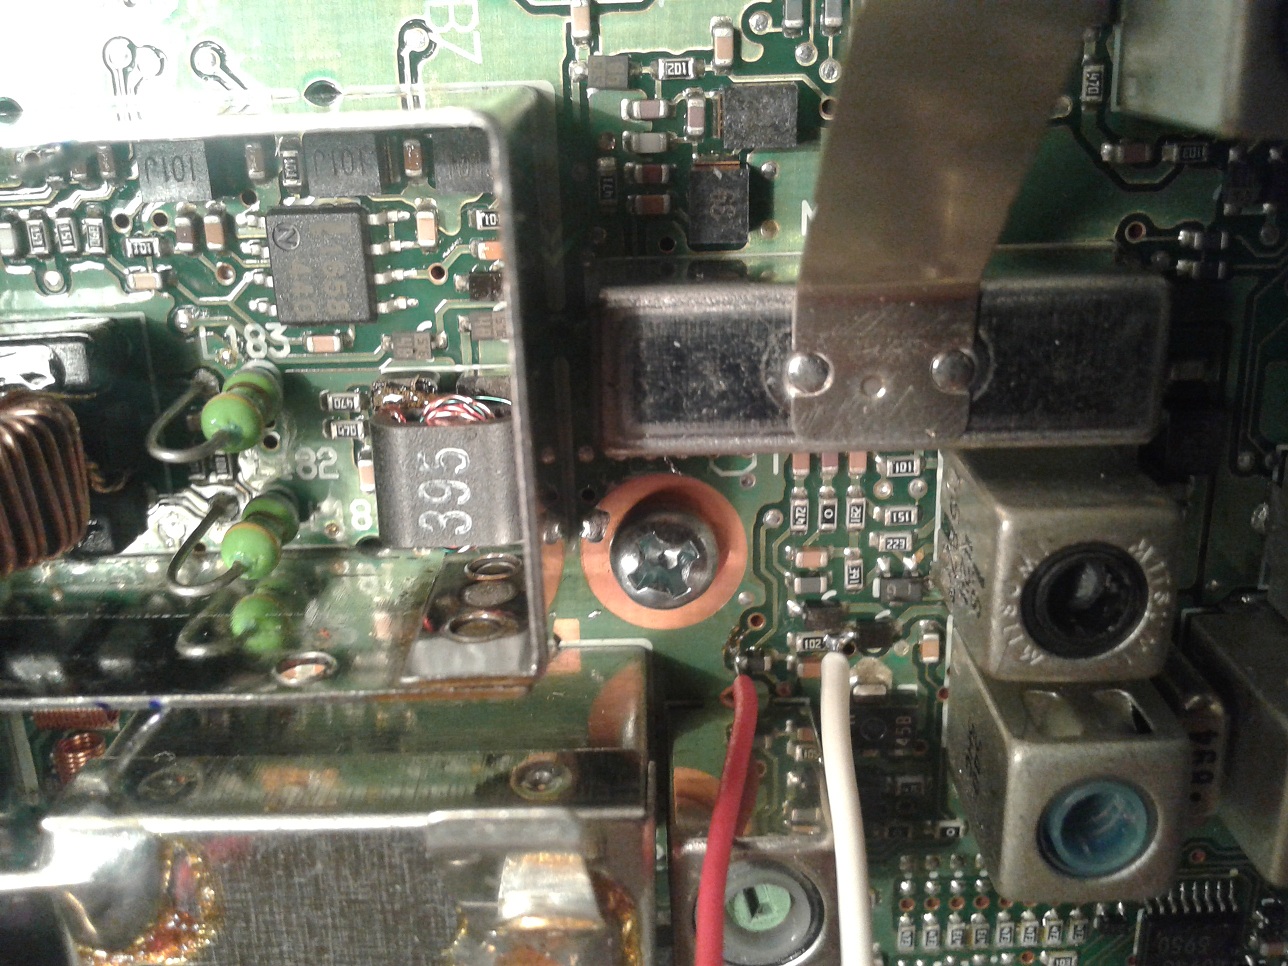
IC765
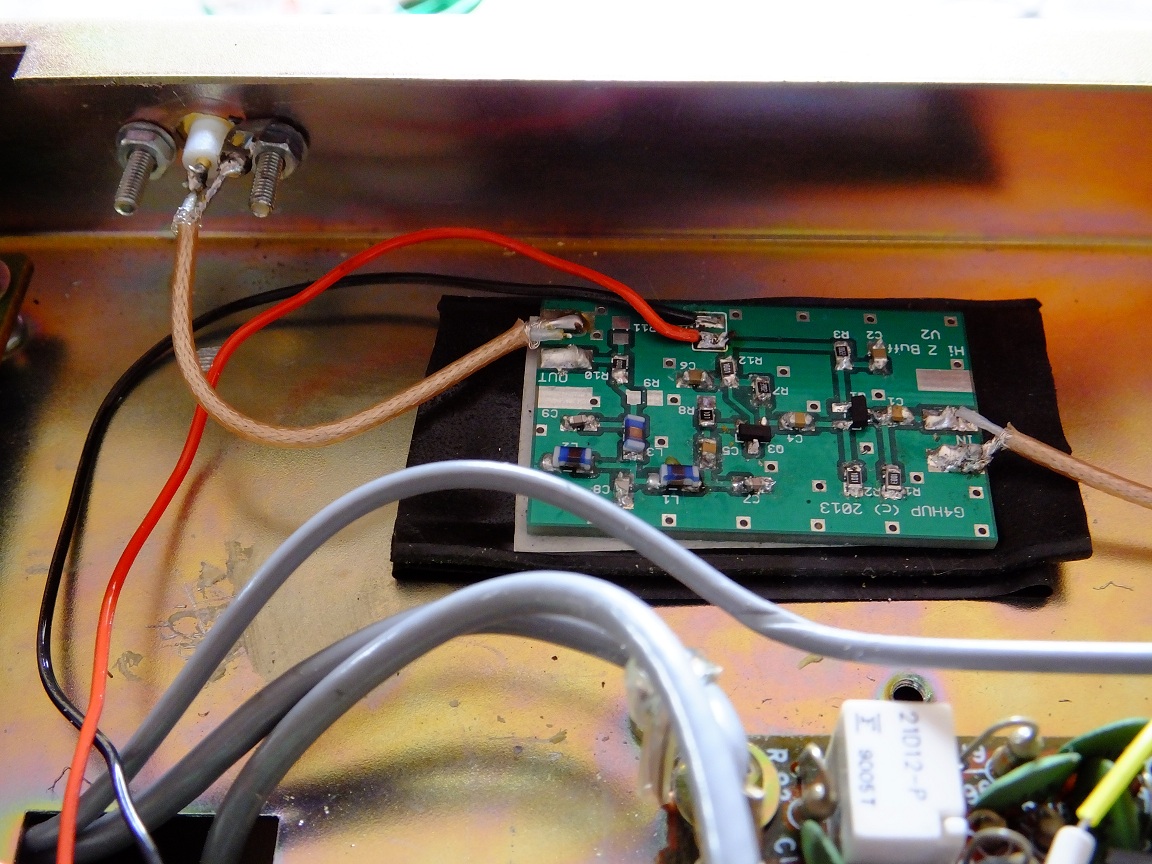
IC765 PAT board mounting

IC7400
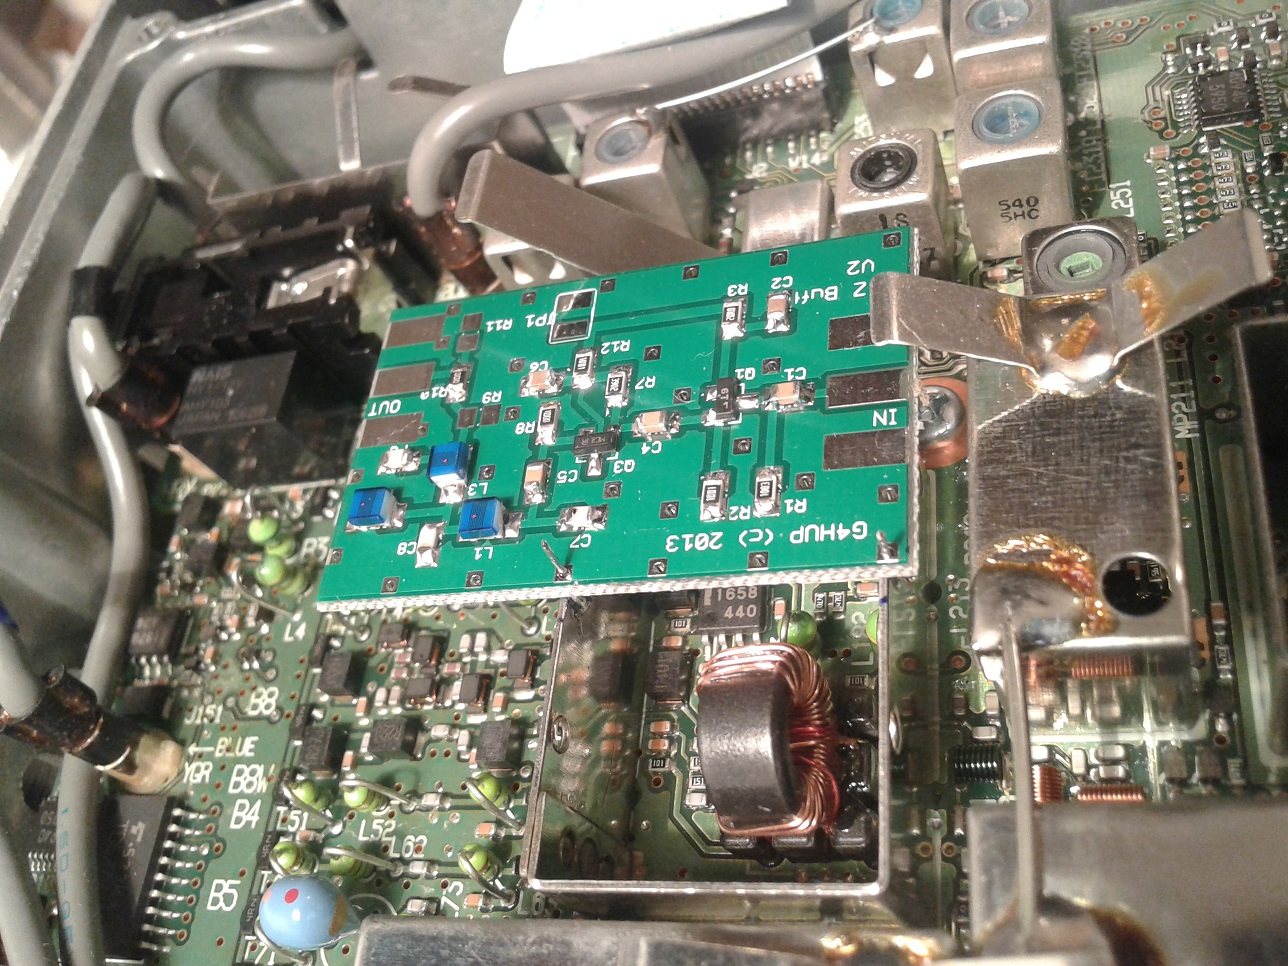
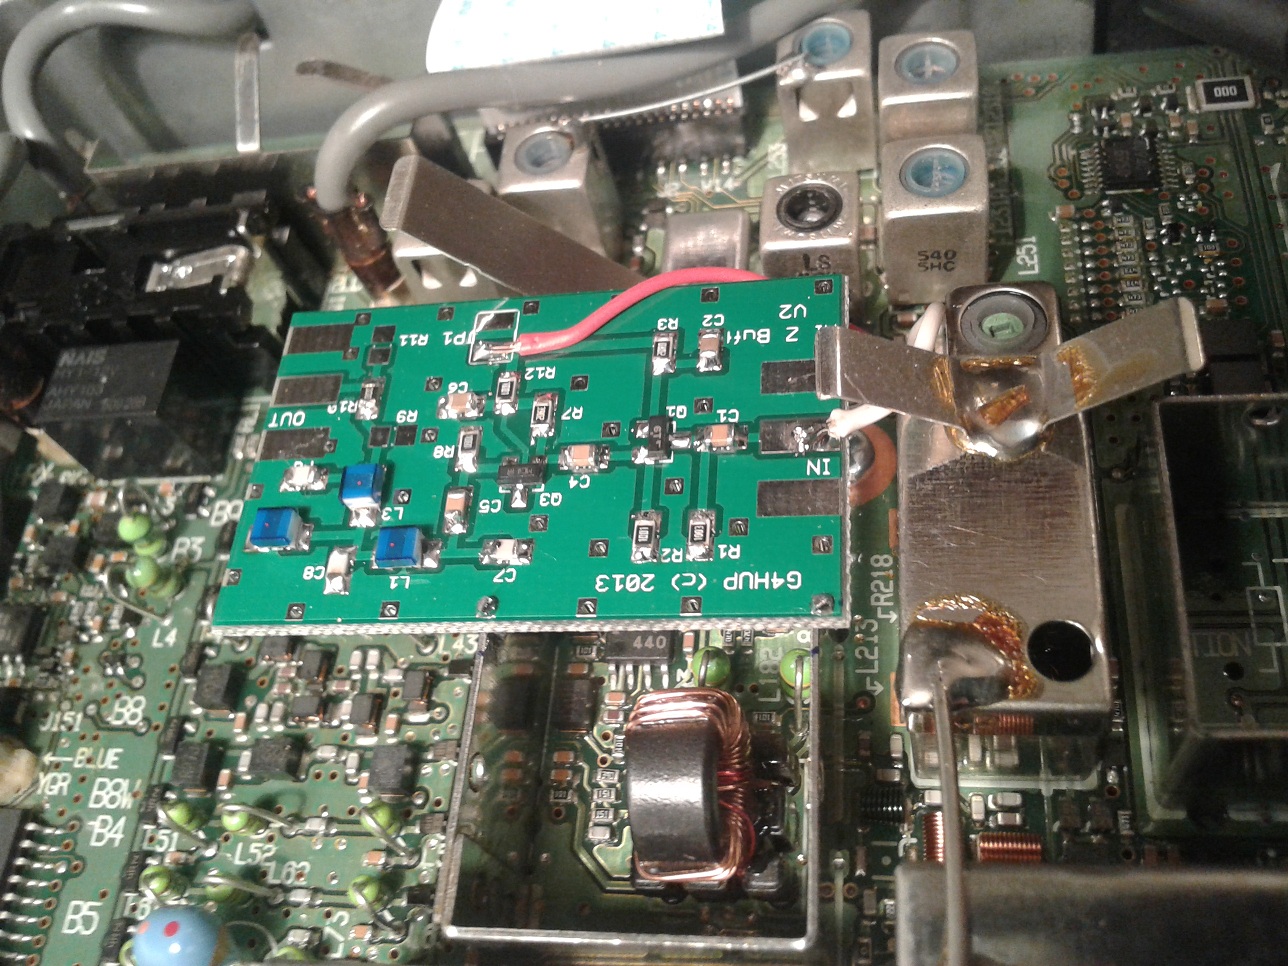

PAT installed in IC7100 – note that the blue capacitor is not required, but remains from a previous direct tap.
IC765 PAT board mounting